Aug 2021 – May 2022

Lead Mechanical Engineer on a complete product design-to-production team, creating a personal comfort system to address built environment sustainability
In my Junior Year of my Mechanical engineering degree, I applied for undergraduate research, hoping to gain some hands-on experience with Product Design. Luckily for me, I was granted an amazing opportunity to work with Dr. Hui Zhang, Dr. Edward Arens, Thomas Hirn, Federico Dallo, Charlie Huizenga and the rest of their team on an HVAC Environmental design project, aiming to reduce the energy required to climate control buildings by over 25%.
The solution: instead of actively managing the temperature of a building, control the temperature of the individuals inside instead!
The challenge: design and manufacture a completely modular personal comfort system that will fit hassle-free into the Hyken Chair (very popular office chair), providing heating and cooling via static air circulation and resistance heating. The system was designed to be battery-powered and contains an Arduino and a Raspberry pi. The Pi talks to the building server, relaying environmental and user data, which is then used to control the HVAC system with a 70% increase in efficiency.
I will walk you through the year-long design process, and the decisions we made to arrive at our completed, aesthetically packaged clip-together, user-tested and functional system!
Conceptualization
Because how do you even begin designing a completely new product…
Answer: a whole bunch of messy whiteboards, confuzzled ideas, and coffee.
We started by laying down our consumer goals and potential client base. Who would use this product? What exactly were we trying to achieve? Who would be our potential market competition?
We narrowed down that our product had to fit the following constraints:
- Provide heating and cooling to the 95% Male and 5%Female (Weight load cases)
- Fit into an existing Hyken chair without modifying the chair geometry in any way
- Be battery-powered and mobile (people love to roll around on wheely chairs)
- Be discrete, silent and aesthetically pleasing
- Affordable, easily manufacturable and consumer assemblable
Great, now we had our starting point. Now what?
Initial concepts and designs
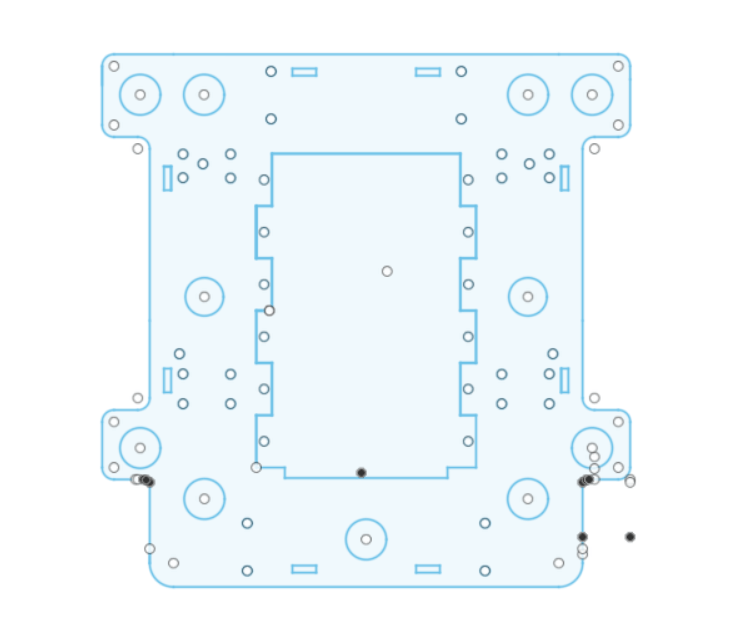
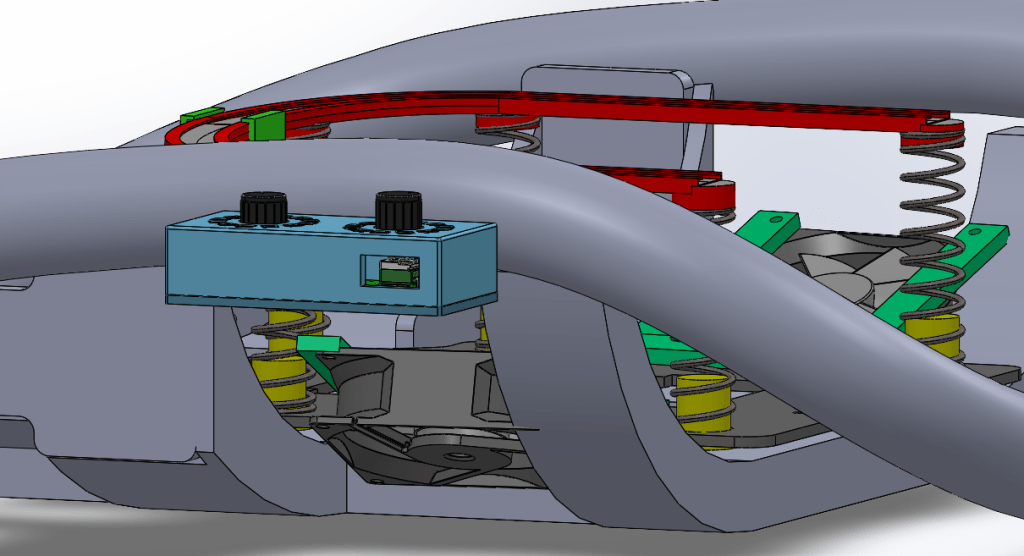
I began by analyzing the existing base of the Hyken chair, where I decided most of the electronics and mechanical components would have to be based. Taking the dimensions of the base, the team produced a model of the base for me to use in creating our initial design concepts. I made rough 2D sketches and 3D assemblies for design reviews, and refinement.
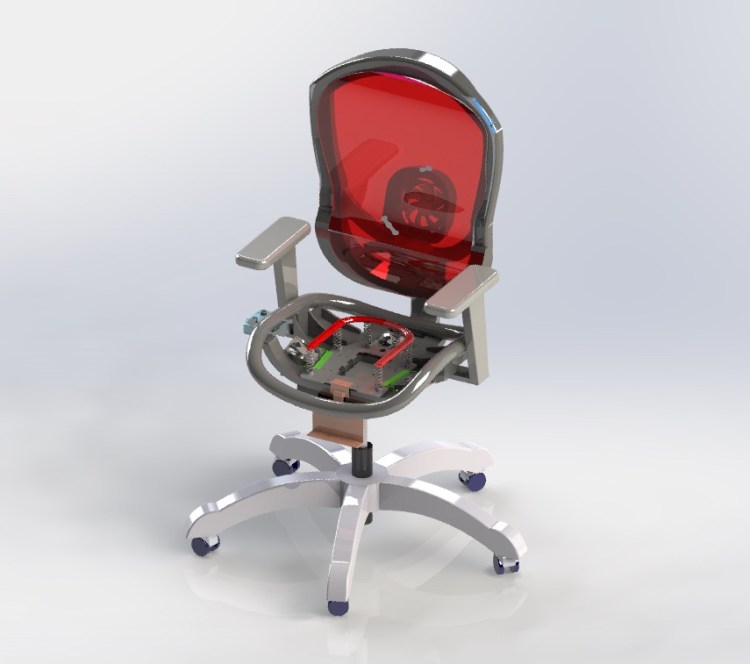
This is an initial concept of the base plate of the whole assembly
I decided the best way to get our heating (resistance) coil up close to the user’s *rear end* would be to have the whole heating system on springs which would adjust with adjustments in the user’s weight distribution (i.e legs moving). * Why did the heating coil have to be close to the user * you may ask?
Traditionally space heaters use either high-power bulbs or forced air over heating coils to heat up a space, but we wanted minimum power usage (batteries), silence (no fans), and efficiency.
To satisfy these requirements we went with resistance heaters, however, these function via conduction – thus have to be in close contact with the medium for heat transfer, or else they simply flux heat through their mount.
Springs gave us this flexibility to be up close to the user!
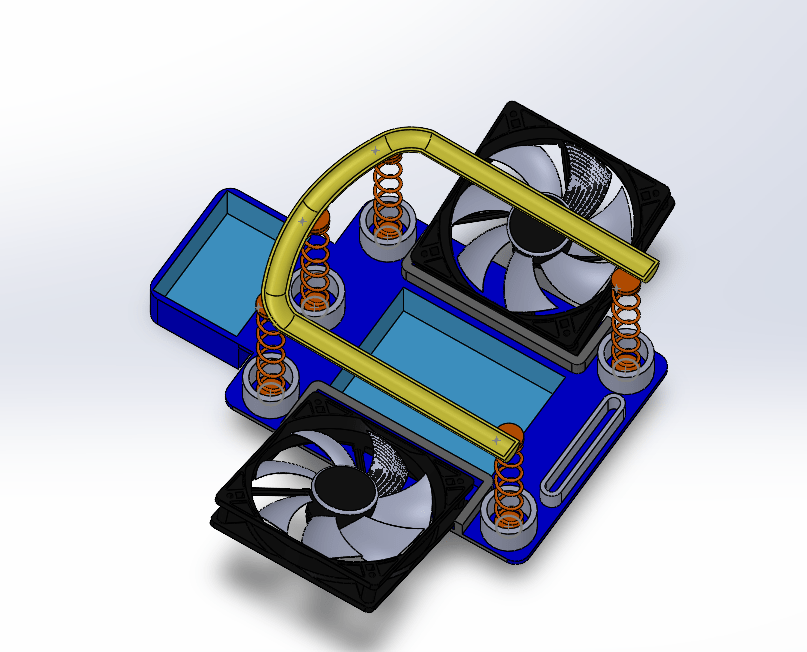
This system would slot into the existing spaces in the chair base
Futher design refinement
The design continued to evolve, change and grow as we narrowed down our functional goals, load cases, and manufacturing methods. I must have made at least 10 design revisions on each individual part, with a total of 12 unique structural components created. The final system had over 100 components!

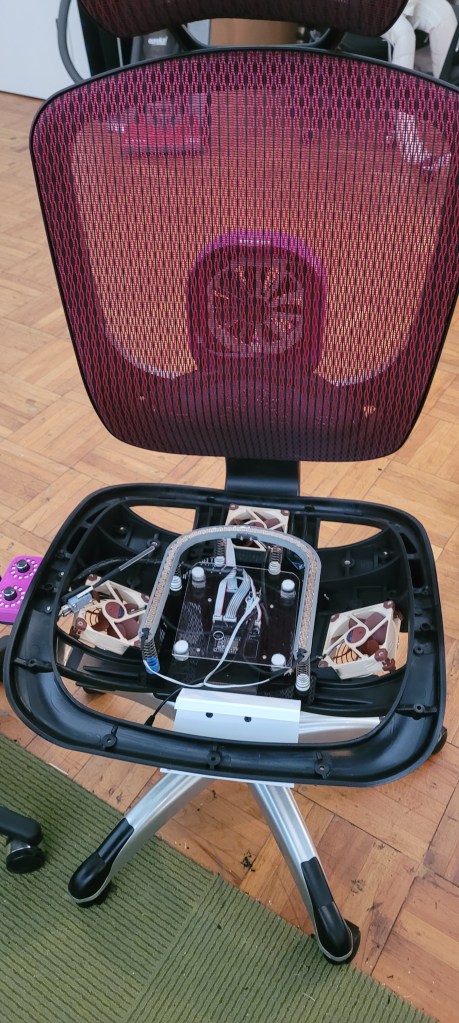
- I added a control box to the external surface, mounted using existing holes on the Hyken chair base.
- The central base plate slots in snugly to a hole in the center of the base, and I created a stand-off structure by tab-slotting the base plate. This way, when I cut it out of acrylic (lightweight, aesthetic, cheap, and decent strength) using the laser cutter the internal component flips around to match the slots on top with stand-offs – creating a 3D structure out of a 2D cut part!
- All the components would have snap fits. The user would have to assemble the system at home, thus it would have to be assembled with minimal fasteners.
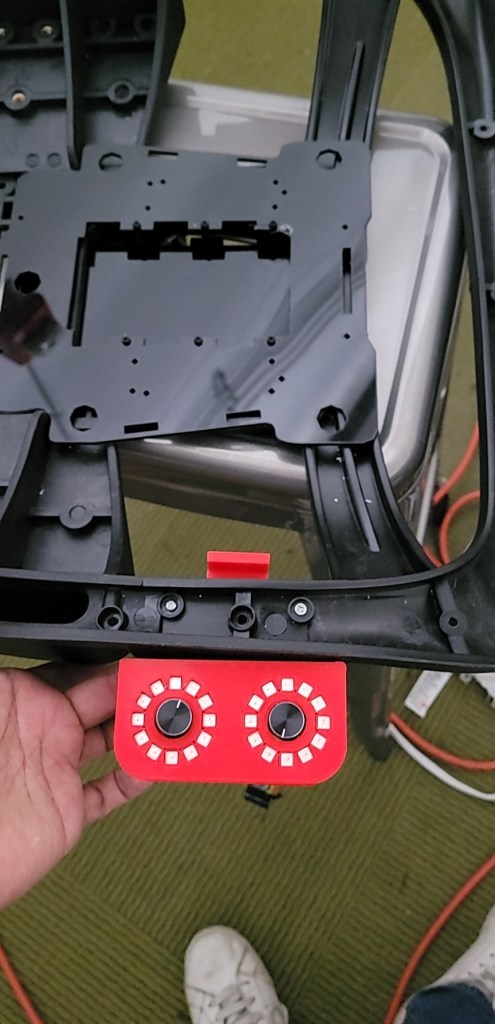
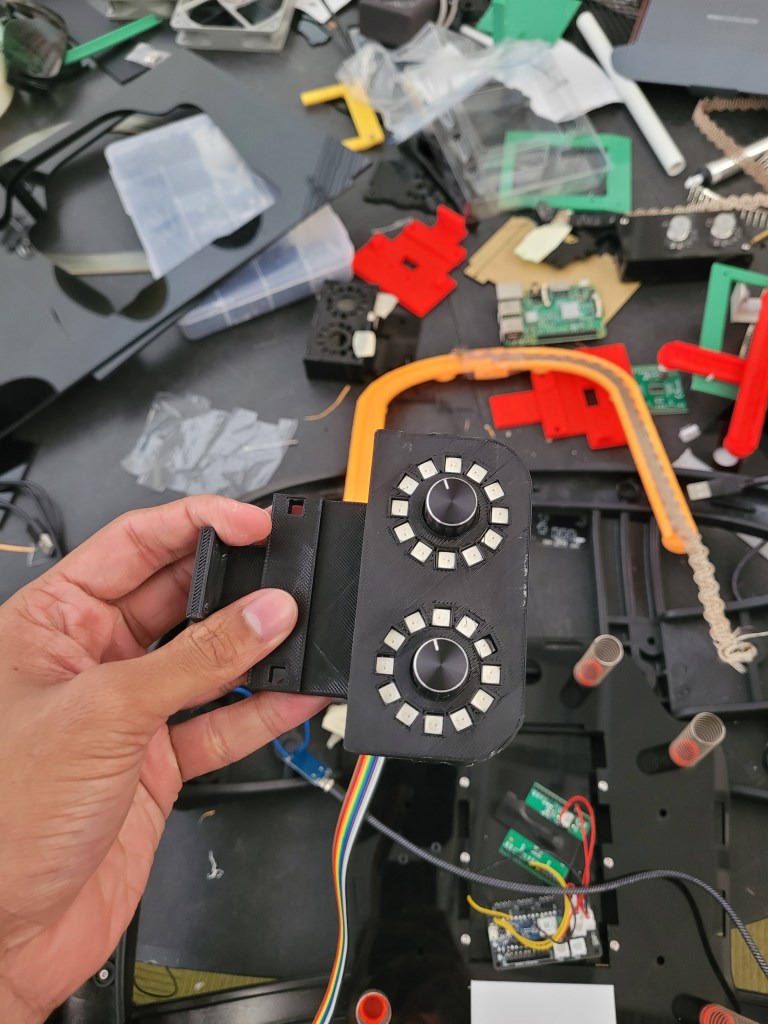
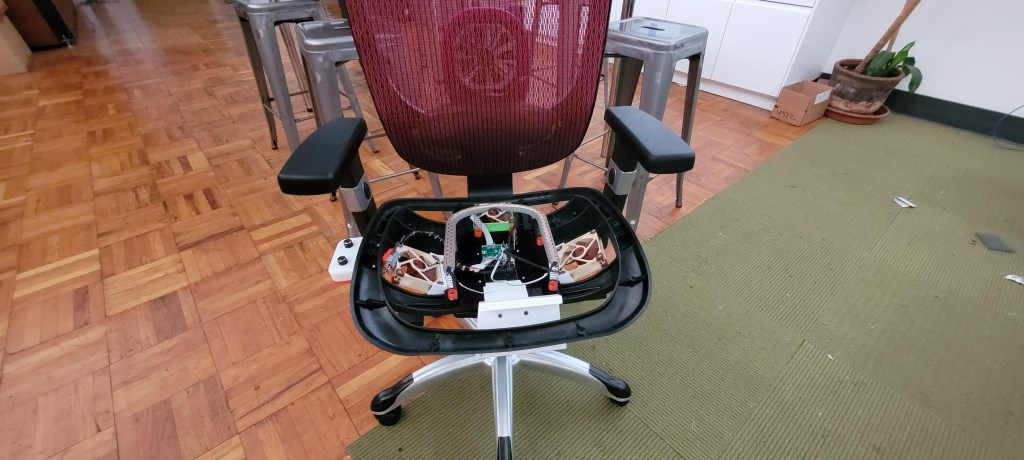
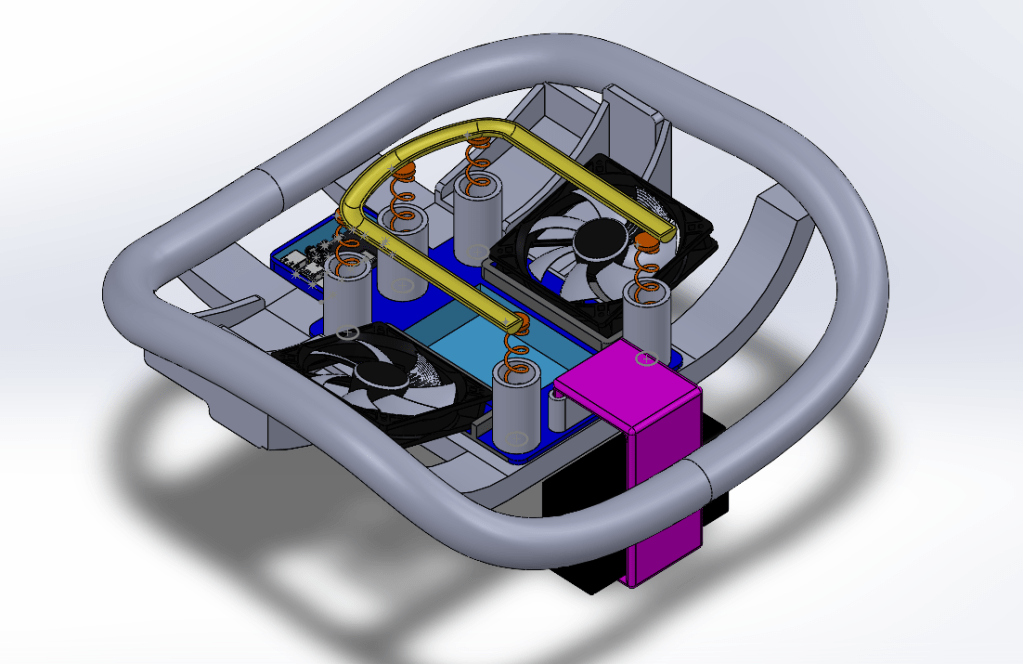
First functional version
After many design revisions and hours of work, I finally created a functional version of the prototype. This included the automatic pressure switch to turn on the system when someone sits down, the neopixel dials for control, snapfit mounts for each component onto the base plate, springs ordered en masse and back mount for fan and heating coil (so your back gets some action too!)

Final stretch
Manufacturing methods and changes
To prototype most of the components I used multiple different 3D printers. Something I discovered was that even if the nozel size is rated to be the same, each printer produces parts different by fractions of a millimeter. This is frustrating if you’re trying to get things to snap together with a satisfying click, but I managed by tolerancing each snap fit to have enough clearance to snap together with worst-case 3D printer variations.
The heater mount was initially made out of PLA, which I switched to ABS once we realized that the heater was conducting a fraction of its power into the mount. PLA has a warp temperature of 60 C and it was rapidly going above that, whereas ABS warps at 120C, very comfortably rigid within our temperature range.
I made adjustments to the way the spring mounts were designed to compensate for a rasping sound when they would compress – the springs were catching on the lip of their mount. I beveled it heavily, solving the problem and allowing for more travel room.
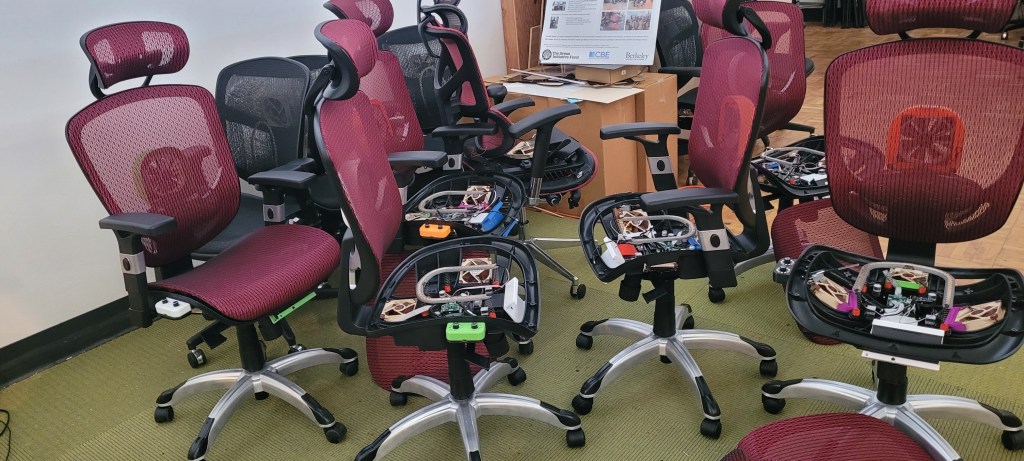
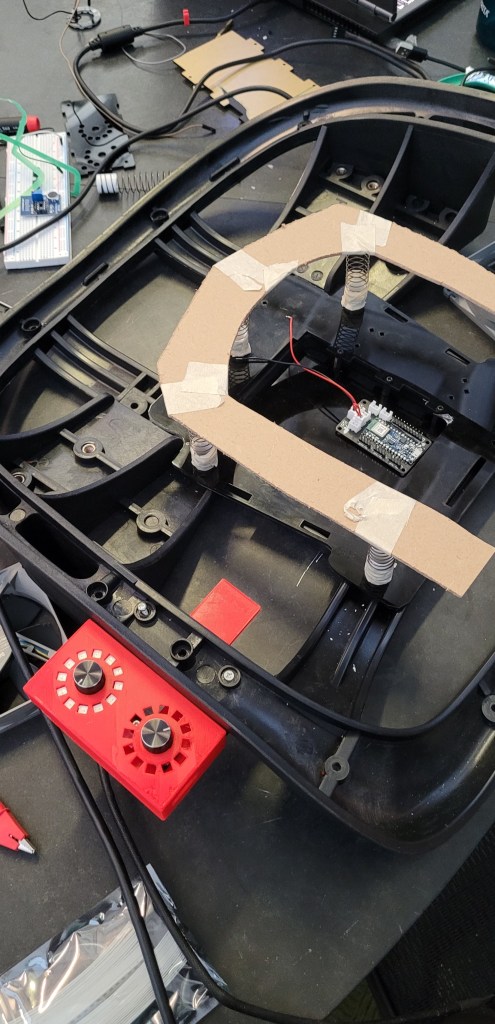
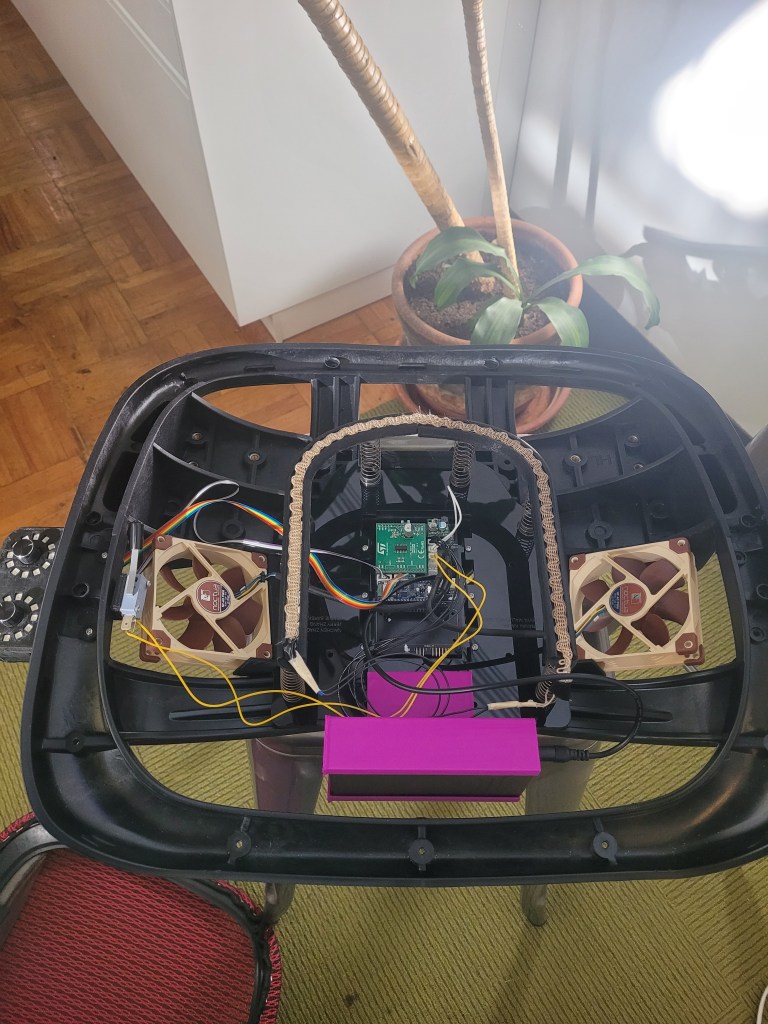
Completed product! (x20)
This is a link to the assembly of the product!
Google agreed to testing our product in their building to assess its energy saving viability, which is incredibly cool!